How to Install SPC Wall Panels

What Are SPC Wall Panels

SPC wall panel stands for Stone Plastic Composite wall panel, mainly made of PVC resin and calcium carbonate. Produced under high temperature and pressure, it combines a decorative layer, wear layer, and a waterproof core with a UV coating surface. The panels feature a click-lock system, making them easy for DIY installation. Lightweight yet durable, SPC wall panels are widely used for interior walls, especially in bathrooms, as a smart alternative to traditional tiles.

Get these five preparations done in advance

1. Tools and materials you’ll need

Except for SPC Wall Panel and accessories,prepare the following tools and materials: a spirit level, pencil, tape measure, utility knife, soft steel rule, double-sided tape, masking tape, structural adhesives, laser level, suction cups, safety goggles, and a safety helmet. These essential tools will help ensure a smooth and safe SPC wall panel installation process.

List of tools for installing SPC wall panels, including utility knife, spirit level, suction cups, and more

2. Wall surface requirements

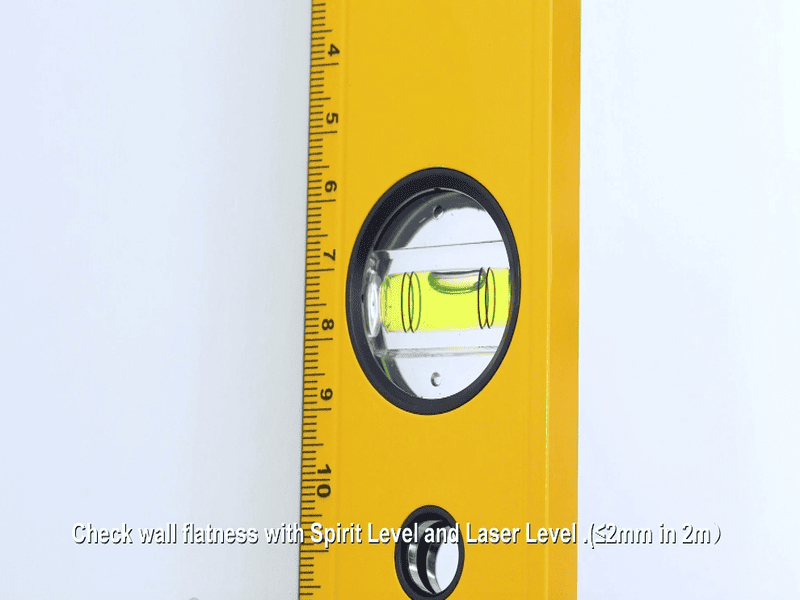
The base wall must be flat, smooth,clean and dry.

3. Stable temperature conditions

Keep the indoor temperature around 10°C-25°C during the installation.

4. Humidity Stability

The moisture content of the wall is ≤8%. Moisture-proof measures are required when necessary.

5. Measuring and planning

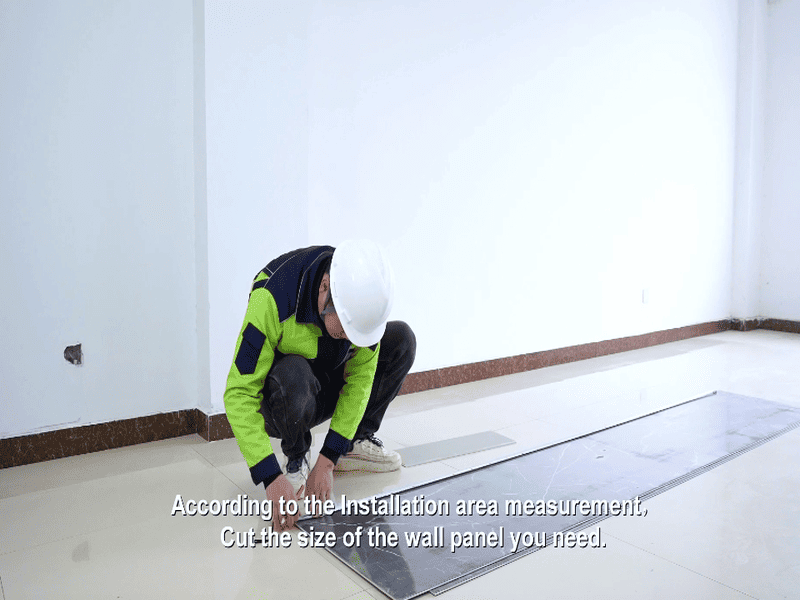
Measure the installation area and plan an extra 5-10% of panels for waste.

7 Step Installation Guide

Step 1 – Make sure the wall flat

Spirit level checking wall flatness for SPC wall panel installation

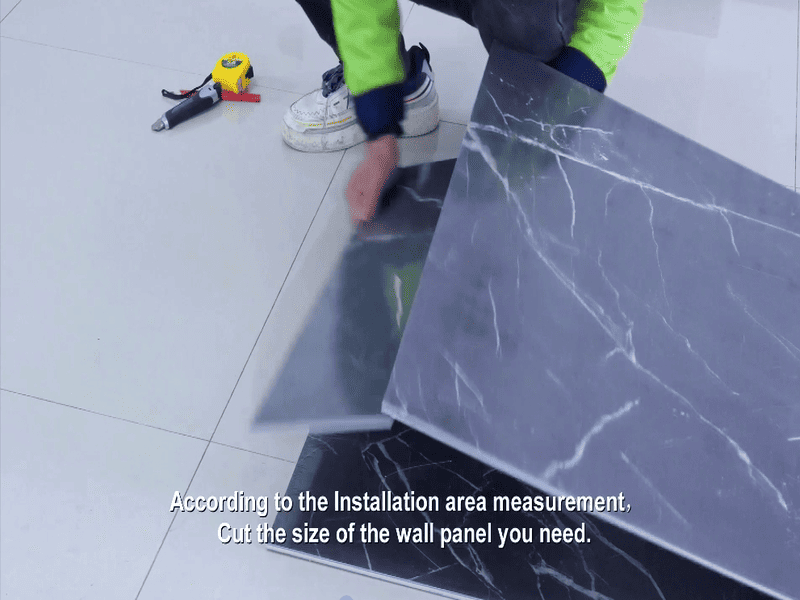
Step 2 – Measure and cut the SPC panels

Measuring installation area for SPC wall panels
Cutting SPC wall panel for installation

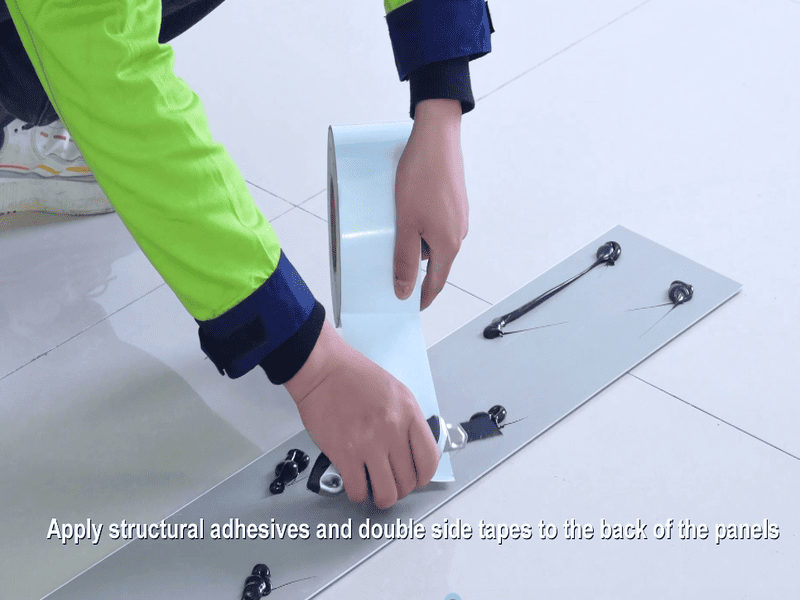
Step 3 – Glue with silicone and double-side tape

Applying silicone sealant and double-sided tape to SPC wall panel for installation

Step 4 – Start installation from a corner

Installing SPC wall panel starting from the corner

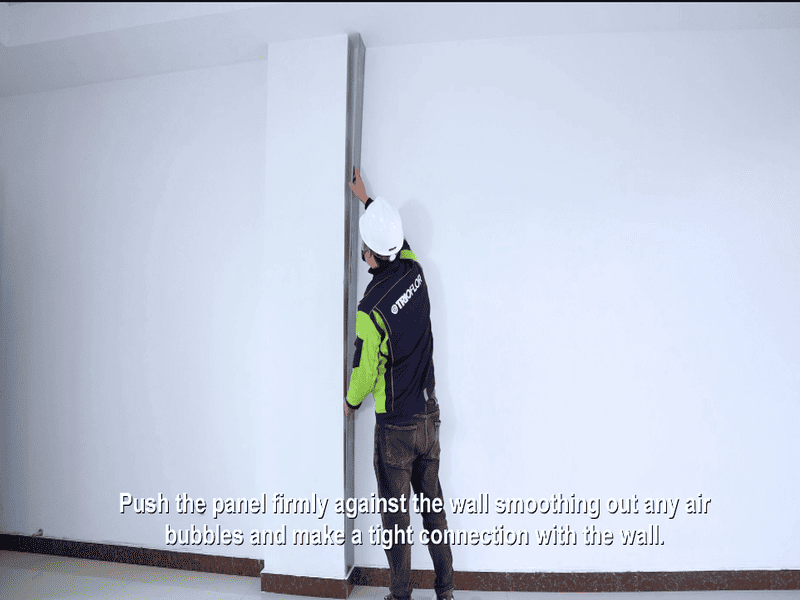
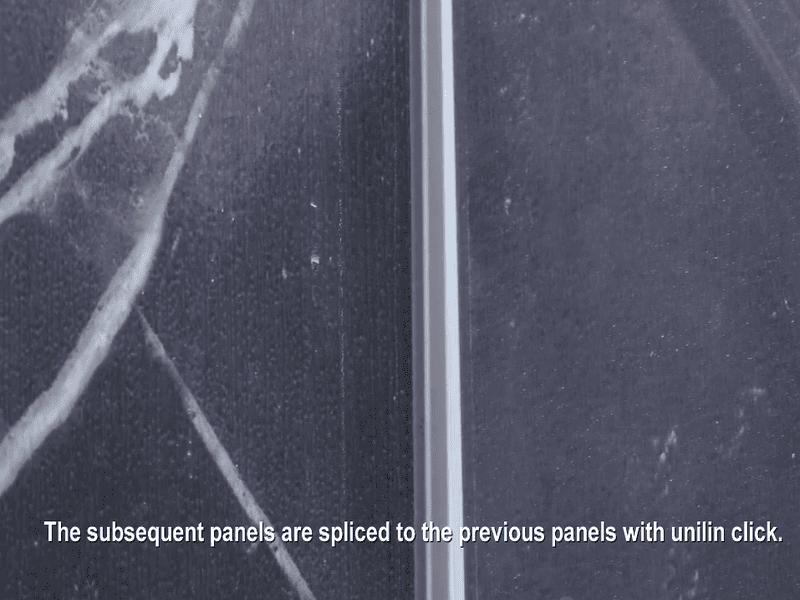
Step 5 – Align and interlock the panels

Installing SPC wall panels with click-lock system
Close-up of SPC wall panels being joined with click-lock system

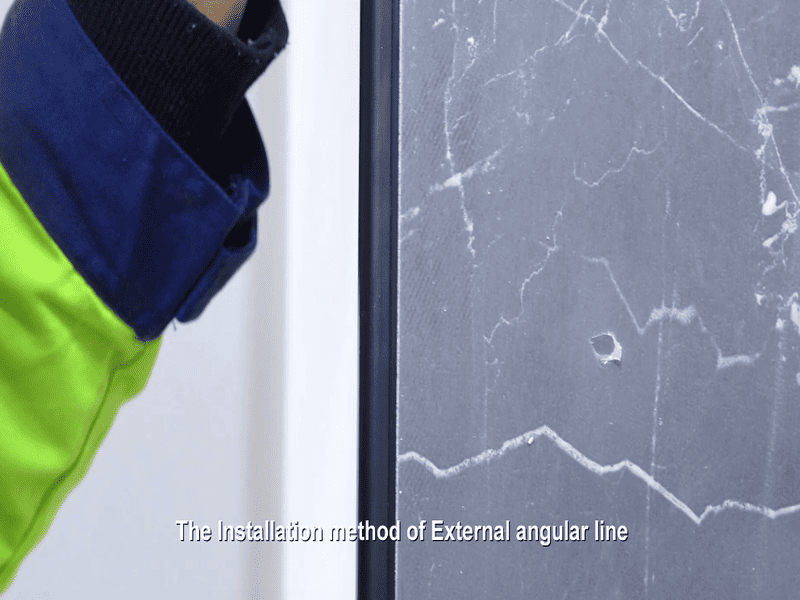
Step 6 – Finishing touches and edge treatments

Installing accessories for SPC wall panel edges

Step 7 – Remove protection film and finish installation

Removing protective film from installed SPC wall panels

Watch the Installation Video

Frequently Asked Questions (FAQ)

Can SPC wall panels be installed as a DIY project?

SPC wall panels are designed with a click system and are lightweight at only 8 kg/m², making them easy to install as a DIY project with simple tools.

Do I need any special tools?

You only need a spirit level, pencil, tape measure, utility knife, soft steel rule, double-sided tape, masking tape, structural adhesives, laser level, suction cups, safety goggles, and a safety helmet.

How soon can I use the room after installation?

After installation, allow the panels to sit for 48 hours in a well-ventilated environment before regular use.


13 responses to “How to Install SPC Wall Panels”

  1. Top 6 Bathroom Wall Options – SPC Wall Panel Avatar

    […] Some wall surfaces require professional installation and specialized tools, while others are designed for faster, DIY-friendly setups. Consider how much time, effort, and aftercare you’re willing to invest. For instance, SPC Wall Panel is perfect for DIYer with click installation. […]

    Like

  2. Top 9 difference between WPC and SPC Wall Panels – SPC Wall Panel Avatar

    […] users. However, SPC panels offer an advantage with their built-in click lock system, allowing for faster and more precise installation—especially in large or professional projects. This feature makes SPC more efficient for […]

    Like

  3. Are SPC Wall Panels Better Than Tiles? – SPC Wall Panel Avatar

    […] construction team, and a longer construction period, resulting in higher costs. In contrast, SPC wall panels can be installed without removing the original wall — just use silicone and double-sided tape. With their click-lock structure, they are highly […]

    Like

  4. How to Waterproof Your Bathroom Wall: 5 Effective Options – SPC Wall Panel Avatar

    […] SPC wall panels deliver very good waterproof performance thanks to a UV coating and click-lock system, making them moisture- and mold-resistant as well as easy to clean. Their installation cost is low to moderate, and they are DIY-friendly, saving on labor costs. Lifespan ranges from 8–15 years. However, if installed improperly, panels may warp slightly. This is a great choice for those with a mid-range budget who want to save on labor and prefer easy installation. […]

    Like

  5. Best Materials for Bathroom Wall Panels: A Complete Guide – SPC Wall Panel Avatar

    […] require little surface leveling; panels can be installed using silicone with double-sided tape or via a click-lock […]

    Like

  6. Trioflor SPC Wall Panels vs Castico Shower Walls Comparison – SPC Wall Panel Avatar

    […] Wall PanelsSPC wall panels provide a much more user-friendly DIY installation experience. Lightweight and manageable by a single person, with a four-sided locking system, they […]

    Like

  7. Why 3.7mm is the Best Thickness for SPC Wall Panels – SPC Wall Panel Avatar

    […] (more than 4mm), although strength may increase, it creates new problems. The extra weight makes handling and installation more difficult, and the higher material consumption drives up both production and transportation […]

    Like

  8. Bending SPC Wall Panels: 90-Degree Right Angle – SPC Wall Panel Avatar

    […] video for a clear demonstration of bending SPC wall panels into a 90-degree right angle. During installation, pay attention to safety: avoid overheating or over-bending, as this may damage the panel or weaken […]

    Like

  9. SPC Wall Panel Outside Corners – 90° Bending, Curved Bending, and Trims – SPC Wall Panel Avatar

    […] SPC wall panel installation, outside corner treatment is a crucial step. Corners are not only the key points for wall […]

    Like

  10. Preventing Blistering and Bubbling in SPC Wall Panels – SPC Wall Panel Avatar

    […] provides customers with complete market support tools, including installation manuals and instructional videos. Through training and guidance, we help minimize risks during transportation and installation. In […]

    Like

  11. SPC Wall Panels with Backside PVC Film: No More Damp Problems – SPC Wall Panel Avatar

    […] the inherent waterproof and moisture-resistant design, installation techniques can further enhance performance. Using the full-spread adhesive method allows the panels to bond […]

    Like

  12. Locking Systems of SPC Wall Panels – SPC Wall Panel Avatar

    […] locking system design of SPC wall panels must strike a balance among waterproofing, installation convenience, and cost. Trioflor’s modified i4F locking system, validated through years of market use, not […]

    Like

Leave a reply to How to Waterproof Your Bathroom Wall: 5 Effective Options – SPC Wall Panel Cancel reply